- Mistakenly delete or format pictures and accidently empty the trash bin.
- The Mac becomes inaccessible due to file system corruption and the precious photos were lost.
- Application malfunction ends up losing images.
- Photos was attacked by virus, after using anti-virus program, the photos were deleted.
- Catalog tree was damaged or corrupted. We are unable to accessible to the value files or folders which contain the priceless images.
Looking for Mac photo recovery tool? Be urgent to recover photos from Mac? You are lucky, the article below will tell you how to retrieve images from Mac step by step.
Step one. Download the terrific application Mac Photo Recovery Software, start it up and you will find it has a very intuitive interface, four options state individually, and you will see your hard disk appear by default in the task list.
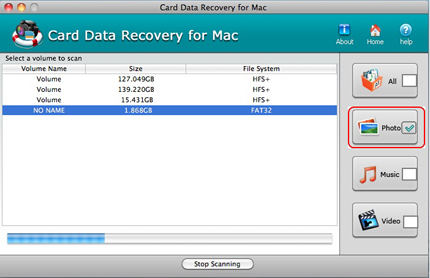
Step two. Select “photo” and hard disk, click “Start Scan”. This step will take a few minutes.
Step three. When finish scanning, you’ll see a display that gives you a head’s up on what’s been found. Here you can preview individual photos in the right window.
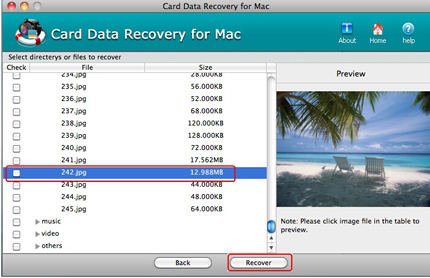
Step four. In the bottom of the preview window, you can see a button labeled “Recover”. Click it and you’ll then be asked to select a folder within which all photos will be saved. Select the folder and click “Save” to save the stuff.(Here, we advice you save your photos to other removable devices like USB, pen drive, etc. to reduce the risk of data overwritten.)

Mac Photo Recovery Software can help you recover pictures in the following circumstances:
No comments:
Post a Comment